
Changing the pickups on an electric guitar represents one of the most impactful and immediate methods to fundamentally alter an instrument’s sonic character. This specialized know-how is not merely a pathway to tonal exploration but also an indispensable skill for comprehensive troubleshooting, repair, and routine maintenance, offering guitarists autonomy over their equipment. The financial outlay associated with professional pickup installation, which encompasses the cost of the pickups themselves alongside technician fees, can be substantial. Consequently, acquiring a foundational understanding of this process can yield significant long-term savings for musicians. However, it is crucial to acknowledge that dismantling this technical barrier and deepening one’s knowledge in guitar electronics frequently initiates an immersive journey into the intricate world of tone shaping, a pursuit from which many enthusiasts find no definitive endpoint.
This exposition is designed not as an exhaustive, step-by-step manual for novices, but rather as a comprehensive overview explaining the mechanics and, crucially, the inherent value and interest in undertaking such modifications. It aims to demystify the process, providing practical advice and foundational knowledge necessary for guitarists to embark on their own electronic enhancements.
The Historical Evolution of Guitar Tone and Pickups
The electric guitar, since its commercial inception in the 1930s, has continuously evolved, with pickups standing at the forefront of its sonic development. Early designs, such as the "Frying Pan" lap steel by Rickenbacker, utilized horseshoe-shaped magnetic pickups, laying the groundwork for signal transduction. The subsequent decades saw innovations from pioneers like Leo Fender and Seth Lover (for Gibson), who developed the single-coil and humbucking pickups, respectively. Fender’s single-coils, famed for their bright, articulate, and often percussive tone, became synonymous with genres like blues, rock and roll, and country. Gibson’s humbuckers, designed to "buck" or cancel hum by using two coils wired out-of-phase, offered a thicker, warmer, and higher-output sound that profoundly influenced hard rock, jazz, and metal. The aftermarket pickup industry, which exploded in the latter half of the 20th century, has since offered an unprecedented array of choices, allowing guitarists to fine-tune their instruments with precision previously unimaginable. This rich history underscores the centrality of pickups to an electric guitar’s identity and its player’s sonic expression.
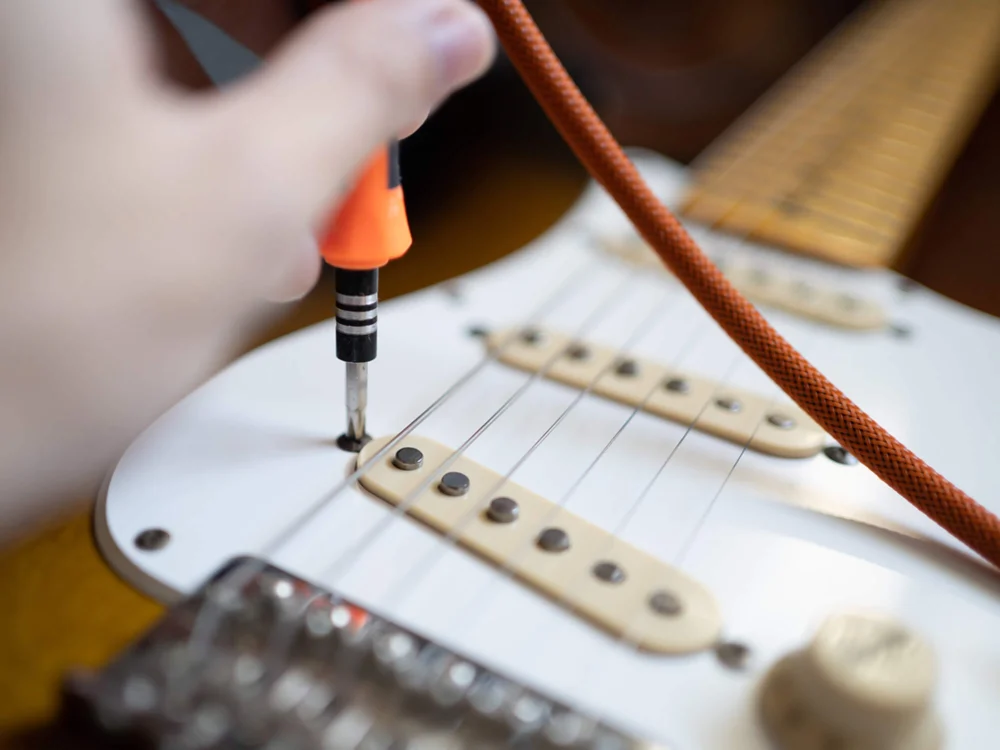
Mastering Essential Skills: The Art of Soldering
Proficiency in soldering is an absolutely critical prerequisite for any meaningful engagement with guitar electronics. While initial attempts may appear unrefined, practical application remains the most effective pedagogical approach. Novice solderers are encouraged to invest in quality equipment and practice on scrap components before working on their instruments. Key principles include:
- Tinning: Applying a thin layer of solder to both the iron tip and the contact points prior to making a joint ensures efficient heat transfer and a strong electrical connection.
- Heat Management: Maintaining the soldering iron on a contact point for excessive durations can damage sensitive electronic components. A rapid, clean joint is the objective.
- Tooling: Essential tools include a temperature-controlled soldering iron (typically 25-40 watts for guitar work), rosin-core solder (lead-free or leaded, with leaded often being easier for beginners), wire strippers, flush cutters, and a "solder sucker" or desoldering braid for error correction. Safety glasses and adequate ventilation are also paramount due to fumes.
Understanding the Fundamental Circuitry
At its most basic operational level, a single pickup functions by converting the vibrations of steel guitar strings into an electrical signal. This is achieved through electromagnetic induction: the vibrating strings disturb a magnetic field generated by the pickup’s magnets, inducing a small alternating current in the pickup’s coil wire. This signal is then transmitted via two primary wires: the "hot" wire, which carries the signal, and the "ground" wire, which completes the circuit and provides a reference point for the signal.
The output jack, often mistakenly referred to as an input jack, serves as the final electrical conduit. It features two terminals: one for the "hot" signal and another for the "ground." These terminals mechanically connect to a standard instrument cable, which then transmits the guitar’s signal to external processing units such as effect pedals or amplifiers. All other components within the guitar’s control cavity, including potentiometers, switches, and capacitors, act as interceptors or modifiers of this fundamental signal path.
The Installation Process: From Basic to Complex
For a straightforward pickup swap, the procedure can be relatively uncomplicated. It involves meticulously tracing the existing pickup’s connections to a potentiometer or switch, desoldering these connections, and then soldering the new pickup in its place after correctly identifying its "hot" and "ground" wires. Manufacturers typically provide wiring diagrams detailing their specific color codes for different pickup configurations (e.g., single-coil, humbucker, coil-split options). This direct replacement approach applies universally to various control cavity components. However, the complexity escalates considerably when troubleshooting existing issues or undertaking more elaborate augmentations of the guitar’s electronic system.
Interceptors and Modifiers: Shaping the Signal
The "interceptors" mentioned previously are the components that allow for tonal and volume manipulation. These primarily include:
- Potentiometers (Pots): These variable resistors are fundamental to volume and tone control. A potentiometer typically has three terminals. When configured as a volume control, one terminal serves as the signal input from the pickup, another as the output to the next stage in the circuit (e.g., a switch or output jack), and the third is connected to ground. Rotating the pot’s shaft alters the resistance, thereby attenuating the signal level. For tone controls, a capacitor is added to the circuit, allowing the pot to bleed off high frequencies to ground, resulting in a warmer, less bright sound. Potentiometer values (ee.g., 250kΩ, 500kΩ, 1MΩ) significantly influence tone, with higher values allowing more treble to pass through.
- Switches: These devices are used to toggle between different pickups or wiring configurations. Common types include three-way toggle switches (found on many Gibson-style guitars) and five-way blade switches (prevalent on Fender-style instruments). Switches typically have multiple terminals, with a common output and several input terminals, allowing different "hot" signals (from individual pickups or combinations) to be routed to the main output. Advanced switches, such as push-pull or mini-toggle switches, can activate coil-splitting, phase reversal, or series/parallel wiring options for humbuckers.
- Capacitors (Caps): These passive components store electrical energy and are crucial in tone circuits. When paired with a potentiometer, a capacitor forms a low-pass filter. The capacitor’s value (measured in microfarads, e.g., 0.022µF, 0.047µF) determines the frequency at which high-end frequencies begin to be shunted to ground. A higher capacitance value will filter out more treble at a higher frequency range, resulting in a darker tone when the tone knob is rolled down. Different capacitor types (e.g., ceramic disc, polyester film, paper-in-oil) are often debated among audiophiles for their subtle tonal contributions.
Signal Flow and Configuration Examples
Understanding signal flow is paramount. A potentiometer placed at the end of the signal chain, immediately preceding the output jack, functions as a master volume, affecting the entire instrument’s output. Conversely, a pot positioned before a pickup selector switch will only influence the signal of the specific pickup(s) it is connected to, acting as a dedicated volume control for that particular pickup.
Consider the diverse approaches:
- Fender Jazz Bass: This iconic instrument exemplifies a dedicated volume control system. Each pickup (neck and bridge) typically features its own volume potentiometer, with no master selector switch. The signals from both pickups are summed at the output jack, allowing for nuanced blending of the two.
- Gibson Les Paul: In contrast, a Les Paul typically employs individual volume and tone controls for each humbucking pickup, situated before a three-way toggle switch. This configuration permits independent volume adjustment for each pickup. The three-way switch allows the player to select the neck pickup, the bridge pickup, or a blend of both (in the middle position), with the blended volume determined by the individual pickup volumes.
Humbuckers, fundamentally, can be conceptualized as two single-coil pickups wired in series or parallel, with their coils typically wound out-of-phase to cancel common-mode noise (hum). Modern humbuckers often feature four conductor wires plus a ground, allowing for advanced wiring options like coil-splitting (using only one coil of the humbucker for a single-coil sound), coil-tapping (reducing the number of active turns on a coil), or series/parallel switching (altering output and tonal characteristics).
Strategic Troubleshooting Methodologies
A robust understanding of signal flow is the most potent tool for effective troubleshooting. By systematically analyzing the circuit, one can isolate problem areas. For instance, in a two-pickup guitar:
- Single Pickup Failure: If one pickup functions correctly while the other does not, the fault is most likely localized to the non-functioning pickup itself, its dedicated volume/tone controls, or its specific wiring connections to the selector switch. The issue is improbable to reside in shared components like the master volume or output jack, as these would typically affect both pickups.
- No Output: A complete absence of output signal from the guitar generally points towards a problem in a shared component that affects the entire signal path. This could be a failed master volume potentiometer, a faulty connection at the output jack, a short circuit to ground, or a complete break in the main signal wire. While simultaneous failure of two pickups is statistically rare, it is not impossible. Common issues also include "cold solder joints" (poor electrical connections due to insufficient heat during soldering) or frayed wires.
The Role of Capacitors in Tone Shaping
As previously noted, capacitors are pivotal in transforming potentiometers into effective tone controls. Unlike volume pots, which attenuate the overall signal level, tone pots, in conjunction with capacitors, selectively filter out high-frequency content from the "hot" signal. When a tone knob is set to its "maximum" position (often 10), it effectively allows the full frequency spectrum of the signal to pass through unimpeded. As the knob is rotated downwards, increasing the resistance to ground, more high frequencies are shunted away from the main signal path via the capacitor. This results in a progressive reduction of treble, yielding a warmer, darker tone. It is a crucial distinction that a tone pot does not add treble; it merely reduces the amount of high-frequency content present in the signal that reaches the output. Different capacitor values (e.g., 0.022µF for humbuckers, 0.047µF for single-coils) are chosen to tailor the frequency response to specific pickup types and desired tonal palettes.
Broader Impact and Implications
The ability to perform DIY pickup installation and electronic modifications carries significant implications for guitarists and the broader instrument market.
- Cost Savings: By undertaking modifications themselves, musicians can save hundreds, if not thousands, over time, particularly for multi-instrumentalists or those who frequently experiment with their sound.
- Enhanced Customization: DIY modification empowers guitarists to meticulously tailor their instrument’s tone to their precise artistic vision, creating truly unique setups not available off-the-shelf. This fosters a deeper connection between player and instrument.
- Improved Maintenance and Longevity: A fundamental understanding of guitar electronics equips players with the skills to diagnose and repair common issues, extending the lifespan of their instruments and reducing reliance on external technicians for minor repairs.
- Educational Value: The process itself is a valuable learning experience, demystifying complex electrical principles and fostering a more profound appreciation for the engineering behind the electric guitar.
- Impact on Aftermarket Industry: The accessibility of DIY information and tools has fueled a vibrant aftermarket industry for pickups, potentiometers, capacitors, and other electronic components, catering to a diverse range of tonal preferences and budgets.
In conclusion, while the labyrinthine appearance of guitar schematics and control cavities can initially seem daunting, the underlying principles are logical and traceable. The core objective is always to guide the electrical signal from its origin at the pickup to its destination at the output jack. All other components—switches, potentiometers, and capacitors—serve as auxiliary mechanisms to modify, route, or filter this signal. Switches selectively direct the "hot" signal, potentiometers regulate volume, and capacitors, in conjunction with pots, shape the instrument’s tonal character by filtering high frequencies. By mastering these foundational concepts and the practical skill of soldering, guitarists gain unparalleled control over their instrument’s voice, allowing their carefully sculpted tone to flow unimpeded to pedals, amplifiers, cabinets, and ultimately, to the discerning ears of their audience. This journey, while demanding initial effort, rewards the player with a deep understanding and an enriched musical experience.
